How to Find a Water Leak Quicker Using a Thermal Imaging Tool
Water leaks can wreak havoc on your property, causing extensive damage and soaring repair costs. The key to mitigating these issues lies in early detection, and one groundbreaking technology making waves in leak detection is thermal imaging. In this guide, we'll delve into the world of thermal imaging tools, explaining their benefits and providing a step-by-step approach to help you find water leaks faster and more efficiently.

Understanding Water Leaks
Water leaks can stem from various sources, including damaged pipes, faulty appliances, or structural issues. Beyond the visible damage, undetected leaks can lead to mold growth, compromised structural integrity, and skyrocketing water bills. Detecting these leaks early is crucial for preventing extensive damage and unnecessary expenses.

Overview of Thermal Imaging Tools
Thermal imaging tools utilize infrared technology to detect temperature variations, offering a non-invasive and highly effective solution for leak detection. These tools come in various forms, from handheld devices to advanced thermal cameras, all designed to make the invisible visible.

How Thermal Imaging Works
Infrared radiation is the key to thermal imaging. As objects emit heat, thermal cameras capture the infrared radiation they produce. By analyzing these temperature patterns, these tools can identify anomalies that may indicate the presence of water leaks. The resulting visual representations, or thermal images, offer a clear and immediate insight into potential issues.

Preparation for Leak Detection
Before diving into the leak detection process, it's essential to take necessary precautions. Ensure the safety of the area and yourself, and optimize conditions for effective thermal imaging. Remove any obstacles that might obstruct the camera's view and create an environment conducive to accurate temperature readings.

Step-by-Step Guide to Using Thermal Imaging
Tool Setup
Begin by turning on your thermal imager and allowing it to undergo the crucial calibration process. Calibration guarantees that the tool provides accurate temperature readings, laying the foundation for precise leak detection.
Systematic Scanning
Adopt a systematic approach to scanning the area. Start from one end and move methodically across the space, covering every inch. This organized method prevents overlooking potential leak sources and ensures comprehensive coverage.
Identifying Anomalies
As you scan, pay close attention to the thermal images for temperature anomalies. Anomalies, indicated by variations in color or intensity, are key indicators of potential water leaks. A higher temperature in a specific area could signify an issue worth investigating.
Focus on Color Variations
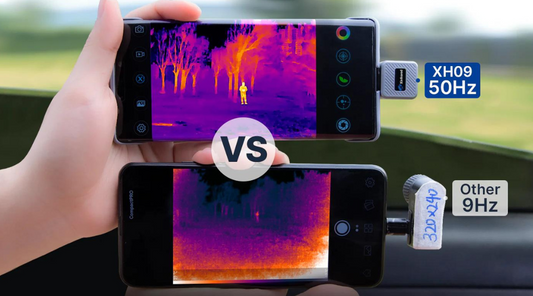
Understand the color variations on the thermal images. Warmer areas typically appear in warmer colors, such as red or yellow, while cooler areas may be represented by blue or green hues. Identifying these variations aids in pinpointing abnormal temperature patterns.

Interpreting Thermal Images
Understanding thermal images is crucial for effective leak detection. Normal and abnormal temperature patterns can be distinguished, and color variations provide valuable insights. By recognizing hidden leaks through thermal clues, you can pinpoint the source of the problem with precision.

Benefits of Using Thermal Imaging
The advantages of thermal imaging for leak detection are numerous. It's a time and cost-efficient method compared to traditional approaches, minimizing damage and potential hazards.
Tips for Maintenance and Calibration
To ensure the longevity and reliability of your thermal imager tool, regular maintenance and calibration are essential. Follow manufacturer guidelines for upkeep, and calibrate the tool regularly to guarantee accurate and dependable results.

Embracing technology in the form of thermal imaging tools is a game-changer in the quest to find water leaks quickly and efficiently. By adopting a proactive approach to leak detection, property owners can save time, money, and the structural integrity of their homes.


